Tool Making Service
What is Tool Making
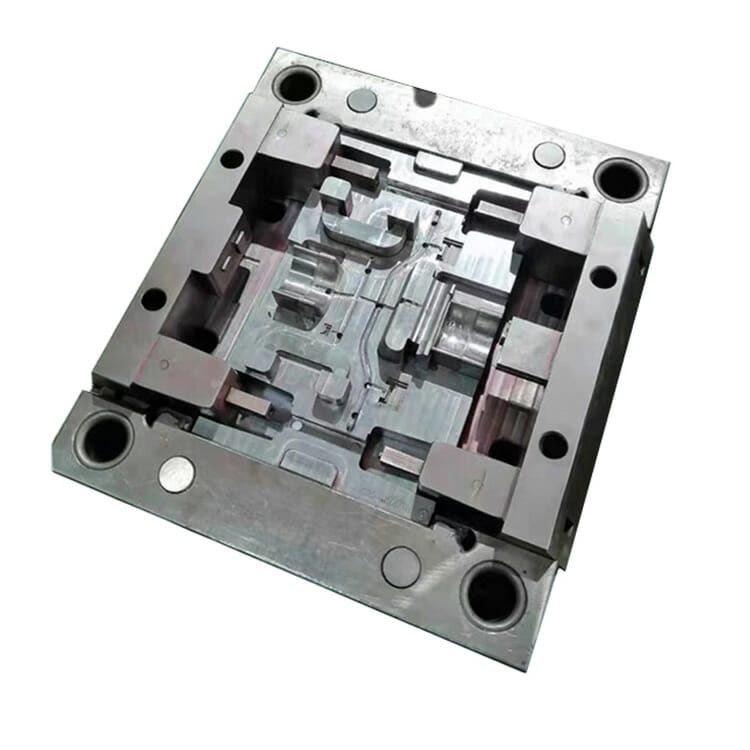
A die is a tool that makes a blank form a specific shape and size under the action of an external force. It is widely used in stamping, die forging, cold heading, extrusion, pressing, and die casting of powder metallurgy parts, as well as pressing or injection molding of engineering plastics, rubber, ceramics, and other products. The mold has a specific contour or cavity shape. The contour shape with a cutting edge can be used to separate the blank according to the contour shape (blanking).
Tool-making dies mould
The mold generally includes a dynamic die and fixed die (or punch and concave die) in two parts, the two can be divided and closed. The parts are taken out when separated, and the blank is injected into the mold cavity when closed. Die is a precision tool, Surface roughness, and machining accuracy have higher requirements.
Mould can be divided into a metal mold and non-metal mould. The metal mold is divided into casting mold (non-ferrous metal die casting, iron and steel casting), and forging mold, Non-metallic moulds are also divided into plastic molds and inorganic non-metallic moulds. According to the different materials of the mold itself, the mold can be divided into sand mold, metal mold, vacuum mold, paraffin mold, and so on.

Request a Quote
"*" indicates required fields
CNC Tool Making
1. All-round matching fixture:
practical for the small amount of production or development of medium and small workpiece milling on a CNC milling machine.
2 special milling fixture:
is a special fixture for a certain or similar several workpiece plan manufacturing, usually in mass production or development must not be taken.
3. Multi-station fixture:
can clamp multiple workpieces at the same time, can reduce the number of knife changes, but also easy to one wall processing, one wall loading and unloading parts, is conducive to shrinkage preparation time, improve productivity, more suitable for medium batch production.
4. Pneumatic or hydraulic fixture:
applicable to large production volume, take other fixtures and special labor, laborious workpiece. Can reduce labor intensity and improve productivity, but the layout of such fixtures is chaotic, the cost is often higher, and the manufacturing cycle is longer.
Tool Making and Measuring
Layered processing: the cooling pipe is the interface between the surface of the mold and other parts of the mold, which has the advantages of good follow-up, a large heat transfer area, and simple sealing. Disadvantages are high precision processing equipment, complex cooling tube, and poor heat transfer performance.
Linpeng type: by setting a series of holes on the surface of the mold and setting a nozzle in the hole, the high-pressure coolant is sprayed into the hot steel plate for quenching and cooling. It has the advantages of a good cooling effect, sufficient material phase transformation, good mechanical properties of parts, difficult processing, serious damage of residual water droplets on the surface of the mold, and reducing the life of the mold.
Borehole type: the borehole type maximizes the layout of pipe fittings under the convex and concave die surface to realize the layout of the insert cooling system. This type is easy to process, easy to change the mold, and good versatility, but there is no way to use the mold processing, mold cooling is not uniform.
Measuring:
(1) Appearance inspection: visual inspection of the appearance of the mold blank whether there is rust, scratch, knife marks, rough surface, and other defects.
(2) Detect the thickness of the template: the template thickness tolerance is ±0.02mm, and the thickness difference of the four corners is less than 0.02mm.
(3) Test whether the mold frame is divided in: test the thickness of the four sides of the mold frame, the difference is less than 0.02mm.

Tool Construction and Design
1. Graphic requirements: Be sure to draw to scale, allowing magnification or reduction. The view is chosen properly, the projection is correct, and the layout is correct. In order to make the processing patent number easy to understand and easy to assemble. The graphics should be as clear as possible and consistent with the assembly drawing.
2. Dimensioning should be unified, centralized, orderly, and complete. The order of dimensioning is to mark the dimensions of the main parts and the deviation of the mold first, then mark fit size, then mark full size. On the drawing of non-major parts, mark the fit size first, then mark the full size.
3. Surface roughness: Mark the most widely used roughness on the upper right corner of the drawing, such as “Other 3.2”. Other roughness symbols are in each surface of the part are marked separately.
4. Other contents: such as part name, mold drawing number, material brand number, heat treatment, and hardness requirements, surface treatment, figure proportion.
Tool Assembly and Tests for Die Casting
Check whether the size of each part to be assembled conforms to the requirements of the drawing and whether the matching relationship of each part can reach the drawing.
For example guide sleeve, guide column and template interference fit, guide column, guide sleeve clearance match, slider, and slide clearance match, and push rod and push rod hole clearance. And parallelism, verticality, hole distance, finish, etc.
(1) check whether steel materials do have a clear identity
(2) concentrate size tolerance is + 0.2 mm.
(3) wool size tolerance of + 1 mm.
(4) the parallelism and perpendicularity below 0.02 mm.
(5) there shall be no appearance defects such as scratch, mark, rust, or obtuse.
(6) according to the specified standard for testing the hardness of steel hardness and judgment.
Request a Quote
"*" indicates required fields